A problem one can ofter encouter while shooting is the
insufficient dynamic range of the sensor. The dynamic range can be described as
the range of brightness values which can be reproduced in a correct manner. Toward
higher brightness values it is limited in a rather sharp way by the saturation of
the photodiods, in other words by the moment in which the photodiods are "full"
and are not able any more to collect further light photons. At the level of the
picture it corrisponds to the areas which are burnt, it means completely white and
whithout any detail.
Toward lower brightness values the limit is less sharp, and it corrisponds to the
brightness value at which the signal becomes indistinguishable from noise.
This means that it is not possible to improve the apparent dynamic range just by
working on the exposure curve, since in this way the darker parts would show inacceptable
amounts of noise when lightened.
An alternative solution is represented by the fusion of differently exposed pictures.
Real HDR photography (High Dynamic Range photography) is based on the modelling
of the physical properties of the sensor by the analysis of various pictures (at
least three), in order to obtain the values of the parameters which characterize
its response to incoming light. Although valuable, this approach is very complicated.
I belive that, at least in some situations, a much simpler approach to the problem
is possible, an approach that completely avoids a modelling of the properties of
the sensor and which is just based on the fusion of two or three jpg pictures, according
to a certain rule, in order to obtain a final image which better reproduces the
real observed scene than any possible simple single photo (in fact this tecnique has
a name on its own: "
exposure fusion". This solution is proposed
on the page
HDR on line
of this web site. The method is based on shooting two or three pictures (with the
same framing, although it is possible to
correct small shifts). In the case of two pictures one overexposed and one
underexposed, in the case of three pictures one overexposed, one exposed correctly
and one underexposed. The two, or three, pictures are then fused, so that in the
darker parts the information from the overexposed picture prevails, in the brighter
parts the information from the underexposed picture.
Compared to real HDR this approach is simplicistic, nevertheless it can deliver
good results in most of the cases in which all parts of the scene can be correctly
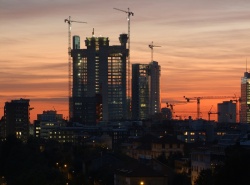
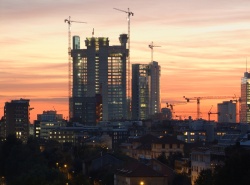
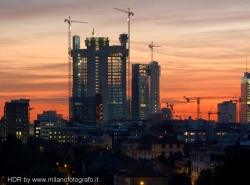
exposed at least in one of the two starting pictures. In case of strongly contrasted
scenes, like sunsets or windows in a room, or scenes with particular light conditions,
like reflections, this can not be the case and real HDR would be necessary.
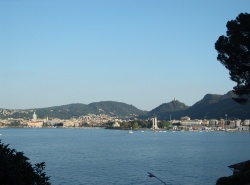
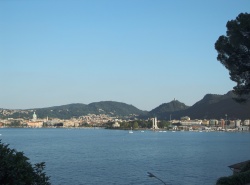
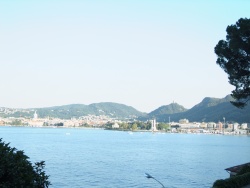
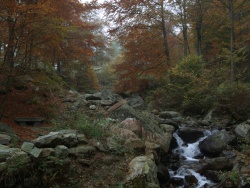
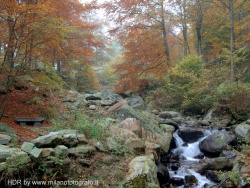
In the following an example. The picture shows a scene in which the trees on the
sides risult more or less agains the light. Exposing correctly for the central parts
of the picture the branches of the trees appear almost black, although in reality
they appeared green, with many recognizable details.
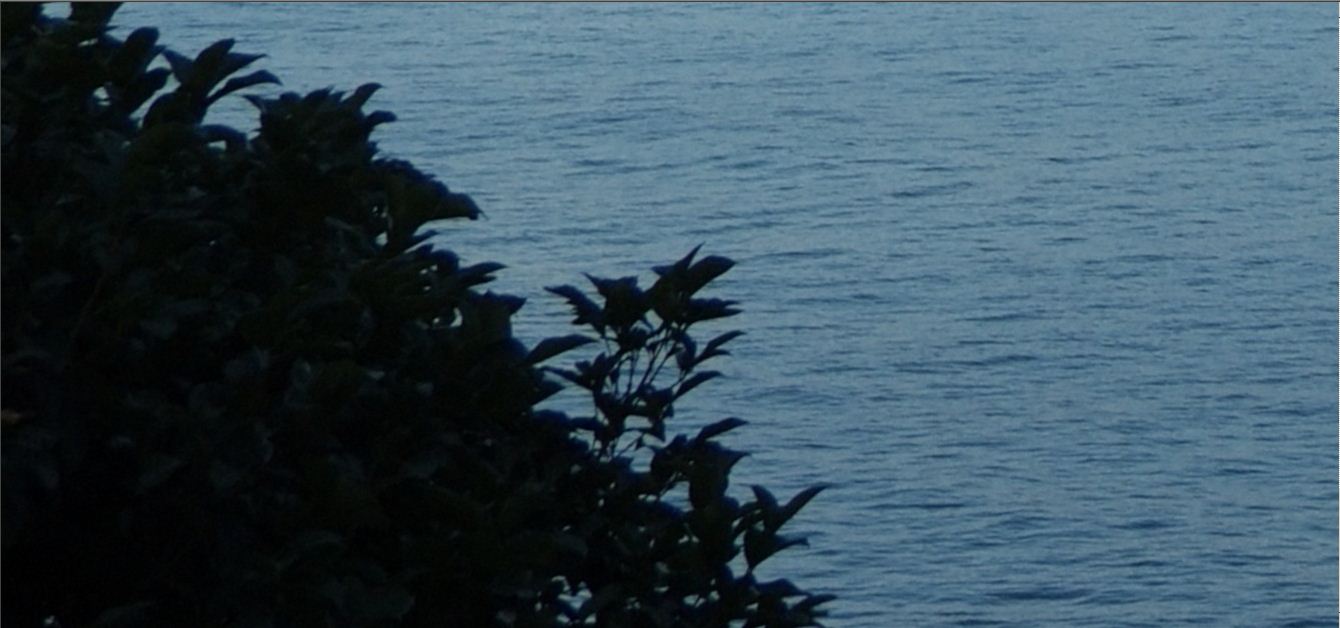
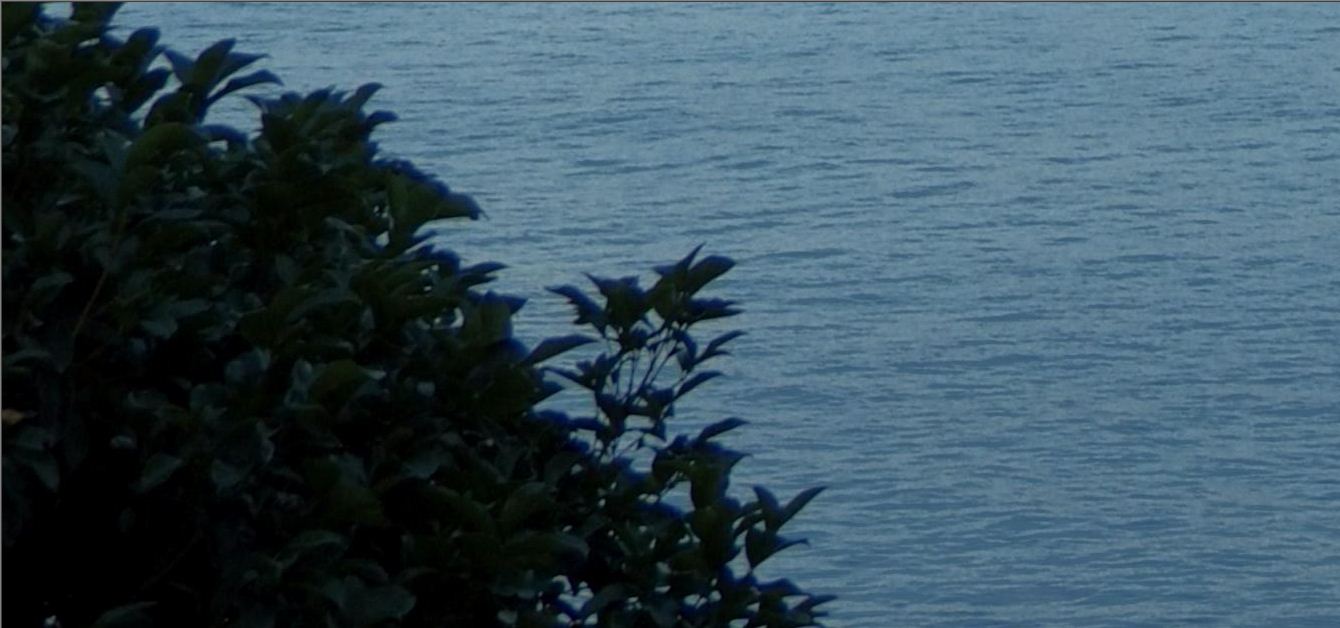
Modifying the exposure curve it is possible to lighten the branches.
If you look in detail, however, you see that in the parts which have been lightened
there is now much more noise than in the rest or the picture and that the details
are there not very well recognizable anyway.
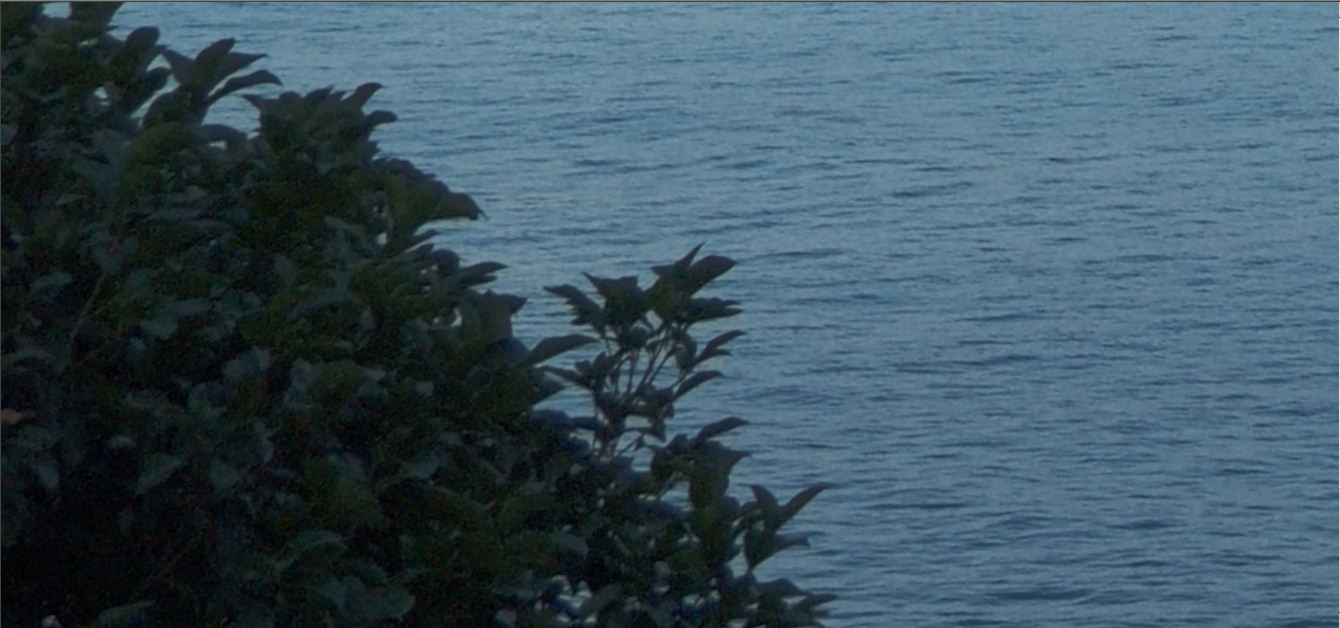
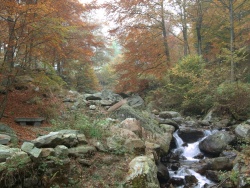
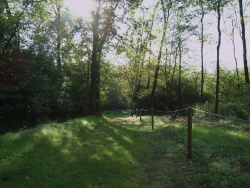
Using instead a second picture, with a longer exposure time, so that the trees are
correctly exposed,
and fusing it with the first one, according to a particular algorithm, described
further forward, it is possible to get a better result
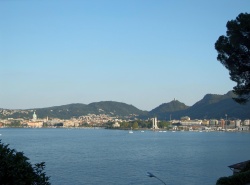
in which the trees are at the same time correctly exposed, don' t show more noise
than the rest of the picture and possess a good amount of details.
If you want to use this page, in the case of two pictures these are the steps:
- Shoot two or three differently exposed pictures of the same scene: in case of two pictures
one overexposed and one undereposed, in the case of three picture one overexposed,
one correctly exposed and one undereposed.
- Upload the picters. Obviously they must be of the same size and shot with identical
frameset. In case of small rotation corrections are necessary, rotate the darker picture
and keep the lightest picture as the reference.
- Choose the best gradiend shape, position and width. You can get a preview of the
result by cliccking on "Preview!"
- Once you have found a suitable gradient you can get the proper mixed photo by clicking
on "Execute Mixing!" After a while in the lower part of the page a large preview
will appear. Clicking on it you can download the mixed picture at full resolution.
The parameters you can vary are the gradient shape, its width and the minimum brightess,
it means the minimum brightness for which all the information, at the level of the
single pixel, comes from the High Lights picture. The brightness of a pixel has
been defined as the normalized square root of the some of the squares of the three
RGB values. If, for example, a pixel has RGB values 100, 150 and 200, respectively,
the brightness will be 0,61. The brightness of black is 0, that of white is 1.
The gradient can have four different shapes:
- Linear gradient
- Spherical gradient (ok, in reality it just has the shape of a quarter of a circle,
but spherical sounds very good!)
- Adaptive gradient
In the first case the percentage of information coming from the High Light picture
increases linearly with the decreasing of the pixel brightness. In the second case,
instead, the information of the Low Light picture is used almost only in the darker
parts of the image. In the third case the system chooses pixel per pixel the more suitable
gradient of the two above.
The following pictures illustrate the two gradient types and the meaning of the parameters
you can work on. The first image refer to the case of two pictures, the other two to the
case of three pictures.
To verify the differences in the resulting picture, depending from the number of the
starting pictures and the type of gradient chosen take a look at the page
Comparison gradient types for HDR on line.
In case of images with not too strong contrasts and, even more, in case of images
with areas with low contrast pattern (old walls, meadows) the spherical gradient is usually more
suitable, because it better preserves the details in those areas than the linear
one.
In case of scenes with large ares with very different brightness the linear gradient shape
with L1 = 0 and L2 = 1 can be more suitable.
The adaptive gradient is often the best solution, but it is also the more time consuming.
In few cases it is useful to set the gradient width larger then the minimum brightness.
This means that in the final
image no picture will contain only information coming from the picture for the Low
Lights.
Also in the case of three pictures it is possible
to choose between two gradient shapes, one linear and one spherical:
It is worth underline that the best choice varies from case to case, and also how much
the two final images will be different. In some cases they will be almost identical, in
some others they will be clearly different.
On the final picture it is often useful to use a simple image editor (FastStone
Image Viewer is pefect for this purpose) in order to increase the local contrast
and sometimes the gamma value. Otherwise the picture tends to look a little bit
dull and darker than the original.
Here some examples, for now only for the case of two starting pictures, but
with three the sense doesn't change a lot. By clicking on the previews you can download half resolution
pictures:
|
High Lights picture
|
Low Lights picture
|
Final picture
|
 |  |  |
 |  |  |
 |  |  |
Shift and Rotation Correction
The page now permits to correct vertical and horizontal shift between the
two pictures. Rotations have still to be corrected in advance with an image editing
tool. For this specific porpose the best solution is
Irfan View), which permits rotation with a precision up to one tenth of degree.
Now an experimental tool to estimate the correct rotation has been added to the page.
By clicking on the less exposed picture you can define (rectangle with red borders)
an area in which the system looks for the pixels with a gradient with magnitude
larger than the chosen treshold and with a collinerity degree larger than the chosen one.
Starting from these pixels (white points in the
finally showed crops) a linear regression line is constructed. The process can be optimized
by choosing the miniIn case of ares whith
sharp linear edges (e.g. in case of buildings) the difference in slope between
the regression lines gives the necessary rotations. For more details see the separated page
Creating HDR images on line: instructions for using the tool for analysing the rotation!
For the moment the tool is very simple, but it is going to be
improved in the future.
Important Note: The images which have to be rotated are always the less exposed ones
(the darker ones). When you rotate them with the external tool be sure
that the autocrop option is not active. Use the larger created images without cutting
away the created lateral triangles. The image is going to be cropped automatically
to the dimension of the low light picture while uploaded.
The correction system includes three options:
- Grid
In this case the necessary corretion is evaluated based on a grid of nine rectangles
uniformly distributed on the image. It is the first way which was implemented, but
is the less reliable.
- Rectangle
In this case it is possible to decide the position and the dimensions of a rectangle
on which estimate the best shift. To do it, click once on the high light image to
open it and double click to close it. I have come to the conclusion that the best
is to create a very large rectangle, which includes the whole image, because this
reduces the uncertainties of the system.
Two cautions: on one hand it is important not to include in the rectangle subjects
which have moved from one picture to the other. On the other hand it is also necessary
to leave enough margins on all sides so that the rectangles doesn't go out of the
shifted image. If this happens, the system will encounter an error. In this case
just go back to the previous page with the browser and choose a smaller rectangle.
- Square to optimize manually the shift
In this case the square part of the two images are shown superposed at original
dimension and in transparency in a dedicated table. Clicking on the arrows it is
possible to shift one square in respect to the other until the subjects are exactly
superposed. The values for the vertical and the horizontal shift can be used to
create the preview or directly the full size image (throuh the button Apply!).
The manual optimization can be necessary in case of images with no sharp edges inside
or in which part of the subject becomes invisible in the longer exposed picture.
Important Note: If the shown square doesn't look like it should, in particolar
with Internet Explorer, delate the cache of the browser!
The option "Use inserted values as starting point!" means that the optimization
process (in case of the first two options) starts from the inserted values. This
is useful to help the algorythm move in the correct directions when the shift is
very large (for example in the case of pictures taken at long focal lentgh).